धीरे-धीरे पढ़ें
Successful Methods for Growing Beautiful Hibiscus
Hibiscus flowers provide an instant exotic charm to any outdoor area. With their exceptionally large and colorful blossoms, these plants serve as an eye-catching centerpiece for backyard garden beds, patios, or balconies. Establishing a thriving shrub is an excellent strategy for introducing bold color into your landscape, and the entire process is highly manageable once you understand the foundational requirements of the plant family.
Brian Scott Robinson
रचनाकार
याद रखें
नीचे पूरी रचना पढ़ें और अपने लिए उपयोगी बात चुनें।
अनुभाग
सकारात्मक विचार
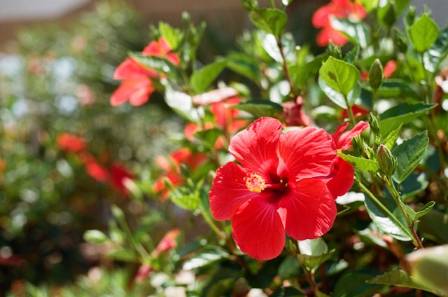
Hibiscus flowers provide an instant exotic charm to any outdoor area. With their exceptionally large and colorful blossoms, these plants serve as an eye-catching centerpiece for backyard garden beds, patios, or balconies. Establishing a thriving shrub is an excellent strategy for introducing bold color into your landscape, and the entire process is highly manageable once you understand the foundational requirements of the plant family.
Identifying the Primary Types of Hibiscus
The broader hibiscus group contains three principal varieties. While every type requires ample sunlight to generate its characteristic floral show, each possesses unique growth habits and climate preferences.
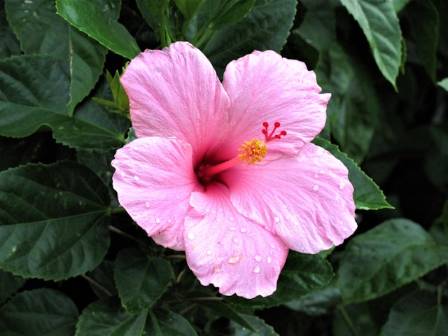
Tropical varieties are famous for their deep green, polished leaves and intensely colored flowers that display shades of gold, orange, pink, or multi-toned patterns. These plants produce flowers continuously over a long period but cannot tolerate cold weather. In cooler climates, they function beautifully as potted specimens that decorate the patio in summer and move inside for protection when winter approaches.
Perennial types are exceptionally cold-hardy shrubs that naturally die back completely to the ground when freezing weather arrives, only to emerge with vigorous new growth each spring. They are celebrated for producing massive, broad flowers in solid shades of crimson, pink, and white. Because the adult shrubs attain a substantial size, they work best when given a dedicated, prominent position in a sunny garden bed.
The third variety is a deciduous, woody shrub that sheds its foliage each autumn. This type is highly reliable, requires minimal upkeep, and generates a dense abundance of slightly smaller purple, pink, or white blossoms. Due to their tall and upright growth habit, these shrubs are frequently grouped together to form a dense, flowering hedge that acts as a magnet for local pollinators.
Selecting Location and Timing
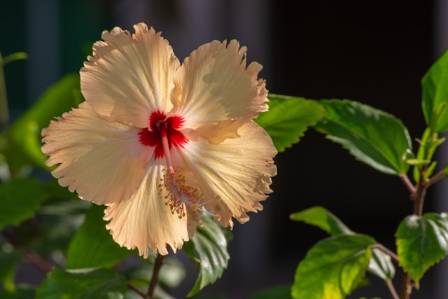
The key to long-term success involves matching each variety to its preferred environment and planting at the correct time of year.
Tropical selections should ideally be kept in pots to ensure portability. You must wait until evening temperatures consistently stay above fifty degrees Fahrenheit before moving these containers out into the open air for the summer. They require a high-quality, free-draining potting medium that holds consistent moisture. In regions that experience scorching summer heat, placing the containers where they receive a bit of relief from the late afternoon sun will keep the foliage from burning.
Perennial selections are moisture lovers, making them an excellent choice for sunny garden areas where the ground tends to retain dampness. Introducing them to the garden in the spring allows the root system a full season to settle before winter. Amending the planting area with rich organic matter or compost provides these heavy feeders with a significant advantage.
The woody, hedge-forming variety is highly adaptable and tolerates a wide spectrum of soil conditions, provided the ground drains well and receives full sun. Because these shrubs can eventually expand to heights of twelve feet and widths of ten feet, ample physical space must be allocated at the start. These hardy shrubs can be safely introduced into the landscape during either spring or autumn.
Instructions for Ground and Pot Installation
Whether you are putting your plants directly into a garden bed or establishing them in containers, utilizing proper installation techniques ensures rapid root development.
For garden beds, the primary objective is to ensure the plant rests at the exact same depth it maintained inside its nursery container. Begin by excavating a space that is twice as wide as the root ball but equal in depth. Gently slide the shrub out of its temporary pot and lower it into the center of the opening. Backfill the remaining space using a balanced blend of your native soil and premium organic garden soil. Tamp the earth down gently to remove hidden air pockets, and immediately provide a deep, thorough soaking to saturate the root zone.
For container cultivation, select a new pot that measures only an inch or two wider than the original nursery container. Line the bottom of the pot with a premium, moisture-managing potting soil to safeguard the roots against both drying out and oversaturation. Position the plant so the top surface of the root ball sits roughly an inch below the container rim, fill the remaining side gaps with additional soil, and water the pot thoroughly.
Essential Moisture and Nutrient Management
Watering requirements vary across the different types, particularly during the initial weeks of establishment.
Perennial varieties possess a high moisture demand. They should receive a deep watering twice a week during their initial summer season, which can be scaled back to a weekly soaking once they are mature. Tropical potted plants require a uniformly damp soil environment. Check the containers daily by testing the top inch of soil with your finger; if it feels dry, apply water immediately. Pots dry out rapidly during windy or intensely sunny weather. The woody hedge variety exhibits excellent drought tolerance once mature, though it still benefits from deep watering during prolonged dry spells.
The blooming period for tropical and woody types extends steadily from mid-summer through the autumn, while perennial types concentrate their energy on a dramatic mid-summer display. To sustain this intensive flower production, begin applications of a specialized, bloom-boosting plant food roughly one month after planting, continuing regularly through the active growing months.
Correct Pruning and Propagation Practices
Strategic trimming helps maintain an appealing plant shape and directly stimulates the production of additional blossoms.
For tropical varieties, simply pinch off individual flowers as soon as they begin to wither, and perform light shaping trims during the summer months. Perennial varieties benefit from having their main stems cut back by one-third in the early summer, which forces the plant to branch out and produce a higher volume of large flowers. In the spring, cut away all the remaining dead stalks from the prior year as soon as fresh shoots emerge at the base. The woody hedge variety should be pruned in late winter or early spring to control its overall dimensions.
Creating new plants from an existing favorite is an achievable project using stem cuttings. In the spring, clip a healthy four-to-six-inch section from the tip of a new branch, making the cut directly beneath a leaf node. Strip away the lower leaves, leaving only a few at the top tip. Insert the cut end two inches deep into a small container filled with a loose, aerated seed-starting mix. Cover the pot with a clear, loose cover to trap humidity, place it in a warm room with bright, indirect light, and maintain light soil moisture until new leaf growth confirms that roots have successfully developed.
Moving Warm Weather Varieties Indoors for Winter
If your local climate experiences freezing winter conditions, tropical varieties must be brought inside to protect them from frost damage.
Begin the transition before the arrival of the first autumn frost, ideally when evening temperatures begin dropping toward fifty degrees Fahrenheit. Before moving the pot inside, trim the branches back by roughly one-third to create a compact shape that fits easily indoors. Give the entire plant a thorough rinsing with a garden hose to dislodge any hitchhiking insects, checking carefully beneath the leaves for common garden pests.
Position the container in a warm room that receives abundant indirect light, such as near a south-facing window. The plant will enter a semi-dormant resting phase during the cold months, meaning its water usage will drop significantly. Allow the soil to dry out almost completely between waterings. Do not be concerned if the plant sheds a large portion of its leaves during this transition; this is a normal reaction to the seasonal change, and fresh foliage will return rapidly once the pot is moved back outdoors in the spring.